Flow Designer#
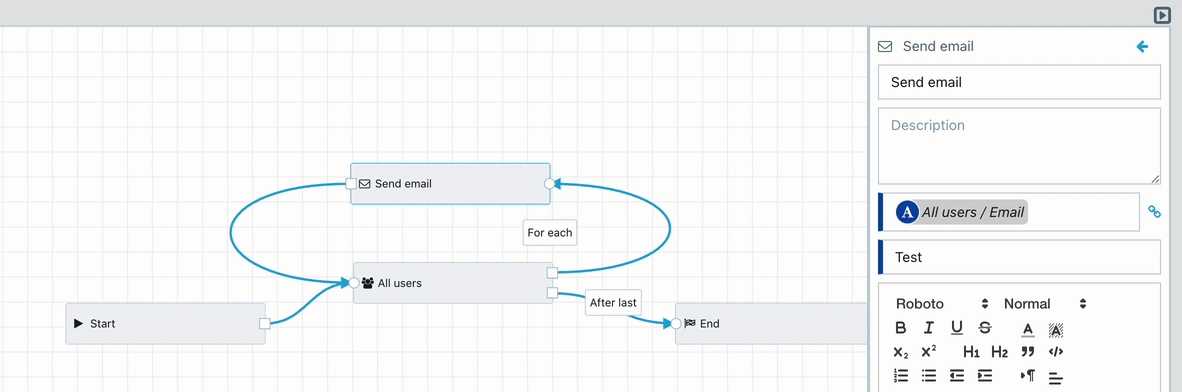
Flow Designer is a visual tool to create digital business process, called "Flows". Each step in the process is called a Node and nodes are connected to each other by Edges. A Flow always has a clearly defined start and end point.
Refer to the detailed documentation of each node type below.
Revisions#
--8← docs/snippets/badges.md:creator --8←
- The revisions/drafts/history is a feature which allows you to update the Flow without changing its published version. This allows you to work on the Flow until you are done without worrying that you can break its published version which is used by other users.
- The revisions are created automatically every time you update the Flow. You can also create a new revision manually.
- The revisions have two stats Published and Draft. There can be only one Published revision.
- Every time you open a Flow in the Flow Designer the Latest revision is loaded.
- The published revision is used when: Duplicating, running the Flow, showing Flow in Flows table.
Nodes#
- Start
- End
- UI
- UI Loop
- UI Lookup
- Date/Time Loop
- Logic
- Switch
- Phone
- SMS
- Push Notification
- HTTP
- MQTT
- Web Function
- Object Get
- Object Query
- Object Create
- Object Update
- Calculation
- Date/Time Calculation
- Code Generation
- User Query
- Flow Starter
- Flow Component
- Table Generation
- Table Loop
- Document Generation
- Document Create
- Document Query
- Value Converter
- Text Resolver
- Parser
- Set Variable
- Slack
- Teams
- Discord
- OpenAI
- DeepL
Inputs & Outputs#
A node can have inputs and outputs to connect to other nodes. Inputs are indicated as circles (typically on the left side of the node), outputs as squares (typically on the right side of the node). You can only connect outputs to inputs.
Some nodes may have no inputs (e.g. Start Node), some nodes may have no outputs ( e.g. End Node), some nodes may have multiple inputs and/or outputs (e.g. Logic Node).
By clicking the Reverse I/O you can flip inputs and outputs around at a node which may be helpful in organizing a
complex flow (e.g. inside looping nodes).
Edges#
An edge is the connection between two nodes. In Flow Designer, edges always have a direction that is visible as an arrow. An edge always goes from an output of a source node to an input of a target node.
Variables#
There are many types of variables: Text, Number, Date, Time, Timestamp, Business Object, User, Table.
Every variable has different color, for example the Text variable is blue and the Number variable is green.
Triggers#
Flows can be executed in different ways:
- Manually by a user (Launch Pad)
- Automatically by a schedule
- Automatically by an event
- Through an API call
- Through a Webhook
- Through another Flow
- Through an incoming email
Whenever a Flow is started, a Run is created.
Debug Mode#
Running a flow in Debug Mode allows you to test your flow functionality without:
- Creating/Updating business objects
- Sending emails
- Sending SMS
- Making phone calls
- Sending Slack/Discord/Teams messages
- Sending push notifications
Note: UIs in debug mode will always be assigned to the user who is doing the debug run. UI assignees set in the Flow will be ignored.
Debug Variables#
You can set these by clicking on the cog icon in the Flow Designer.
You can set
- "Start / Trigger model ID"
- "Start / Trigger object ID"
- "Start / User"
or other custom variables which are set in the Start node.
Autonomous Flows#
Flows that require no user interaction at all are called Autonomous Flows. Autonomous Flows can be identified by a lightning bolt icon. Autonomous Flows are particularly powerful when combined with Bots.
Public Flows#
Flows which are marked as Public can be started from non-logged in users via a public link.
When somebody opens the link the flow is started and if there is an UI it is shown to the user. After the UI is finished the flow continues.
The difference between a normal flow run and public flow run is that the public run only shows one UI and after it's completion there are no more steps for the user. During a normal flow run a user can fill multiple UIs.
The Object Selection element is now supported in public flows for public objects — anonymous respondents can pick from a curated set of Business Objects exposed for public use. Mark the relevant objects as public so they become selectable through the public link.
UI elements which are not supported in public flows:
In order to use Image and Video elements in a public flow you have to set URL for the file source of the element in the UI.
You can pass value from the URL to particular element by setting element_id=some_value as a query parameter in the url - https://dev.mybusiness.ai/public/flows/lMQu3FIrs2DbKtlab42pcH6ZMAb8TqDG?686c6c5f-8e86-40aa-acb7-c0db2fa95ed2=test-value
Offline Flows#
--8← docs/snippets/badges.md:creator --8←
Flows which have a UI node after the Start node can be used offline.
- Start Flow online
- Go to Tasks and select the Task which was generated from the Flow
- Click on the "Download for offline" button
- Go offline
- Click on the task you downloaded(only the downloaded tasks are shown when you are offline)
- You are navigated to UI you have to fill
- Fill the UI and click on "Next/Finish"
- Once you go online the data from the UI will be uploaded automatically and the flow will continue
Tips#
- Select multiple nodes by holding the left mouse button and moving the mouse
- Select multiple nodes by holding Ctrl/⌥ Option and click on node
- Zoom in/out by holding Ctrl/⌥ Option and mouse wheel
- Move canvas by holding Ctrl/⌥ Option and left mouse button and move mouse
- Center vertically/horizontally nodes by selecting them and clicking on the desired button above the canvas
- Distribute equally nodes by selecting them and clicking on the desired button above the canvas
- Delete nodes by selecting them and press "D" key
- Duplicate nodes by selecting them and holding Ctrl/⌥ Option and press "D" key
- Group nodes by selecting them and holding Ctrl/⌥ Option and press "G" key or use the group nodes button
- Search for node/s by holding Ctrl/⌥ Option and press "F" key
- Resize left(Variables section) or right(Node detail section) by moving the mouse over the gray line between the canvas and the section and hold the left mouse button
- Start a Flow from Business Object detail page by adding an Action of type "Start Flow" in Model Designer
- Start a Flow every day, once a week or every Monday by using an Scheduled Bot
- Start a Flow when Business Object is created,updated or deleted by using an Event Bot
- Start a Flow when an event outside of our system has happened using an Webhook