 Ultimate
Azure Active Directory SSO Integration#
To set up Azure Active Directory Single Sign-On (SSO) in Mobile2b, please follow this guide closely. If you have any questions or need help with the setup, please don't hesitate to contact our Support Desk.
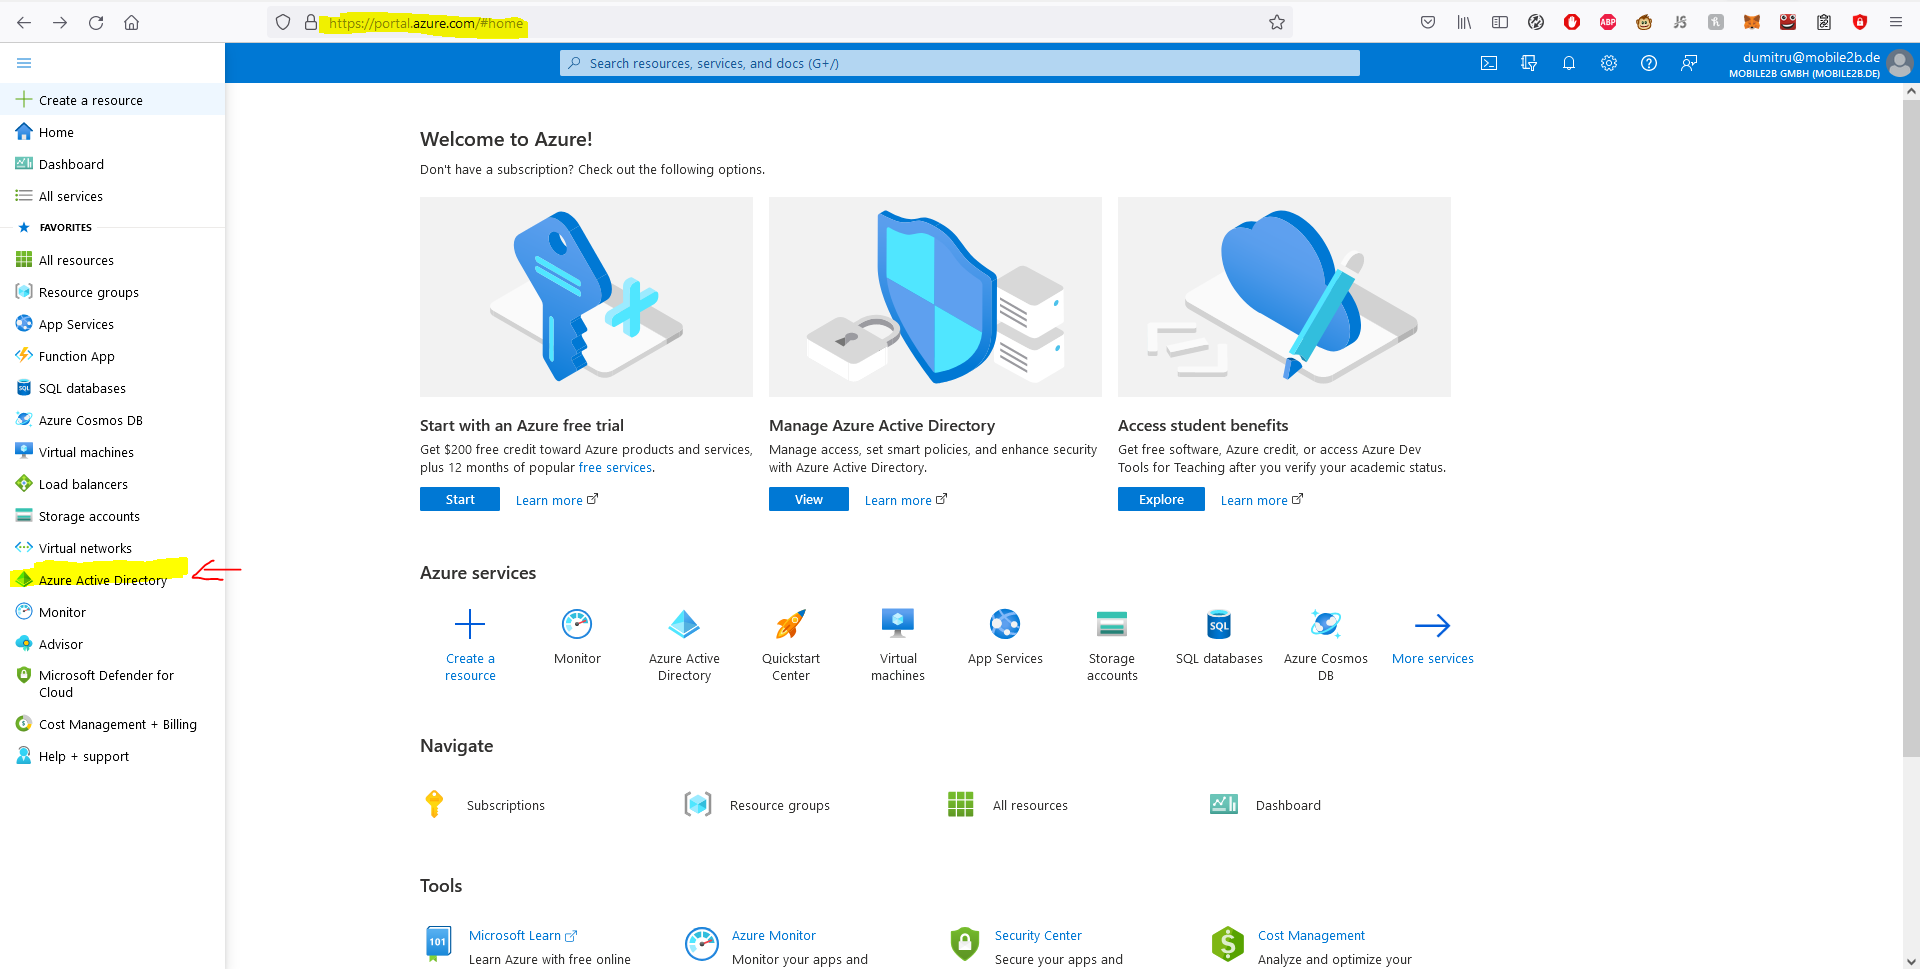
- Log in to your Azure Portal at https://portal.azure.com
- In left hand menu, navigate to "Azure Active Directory"
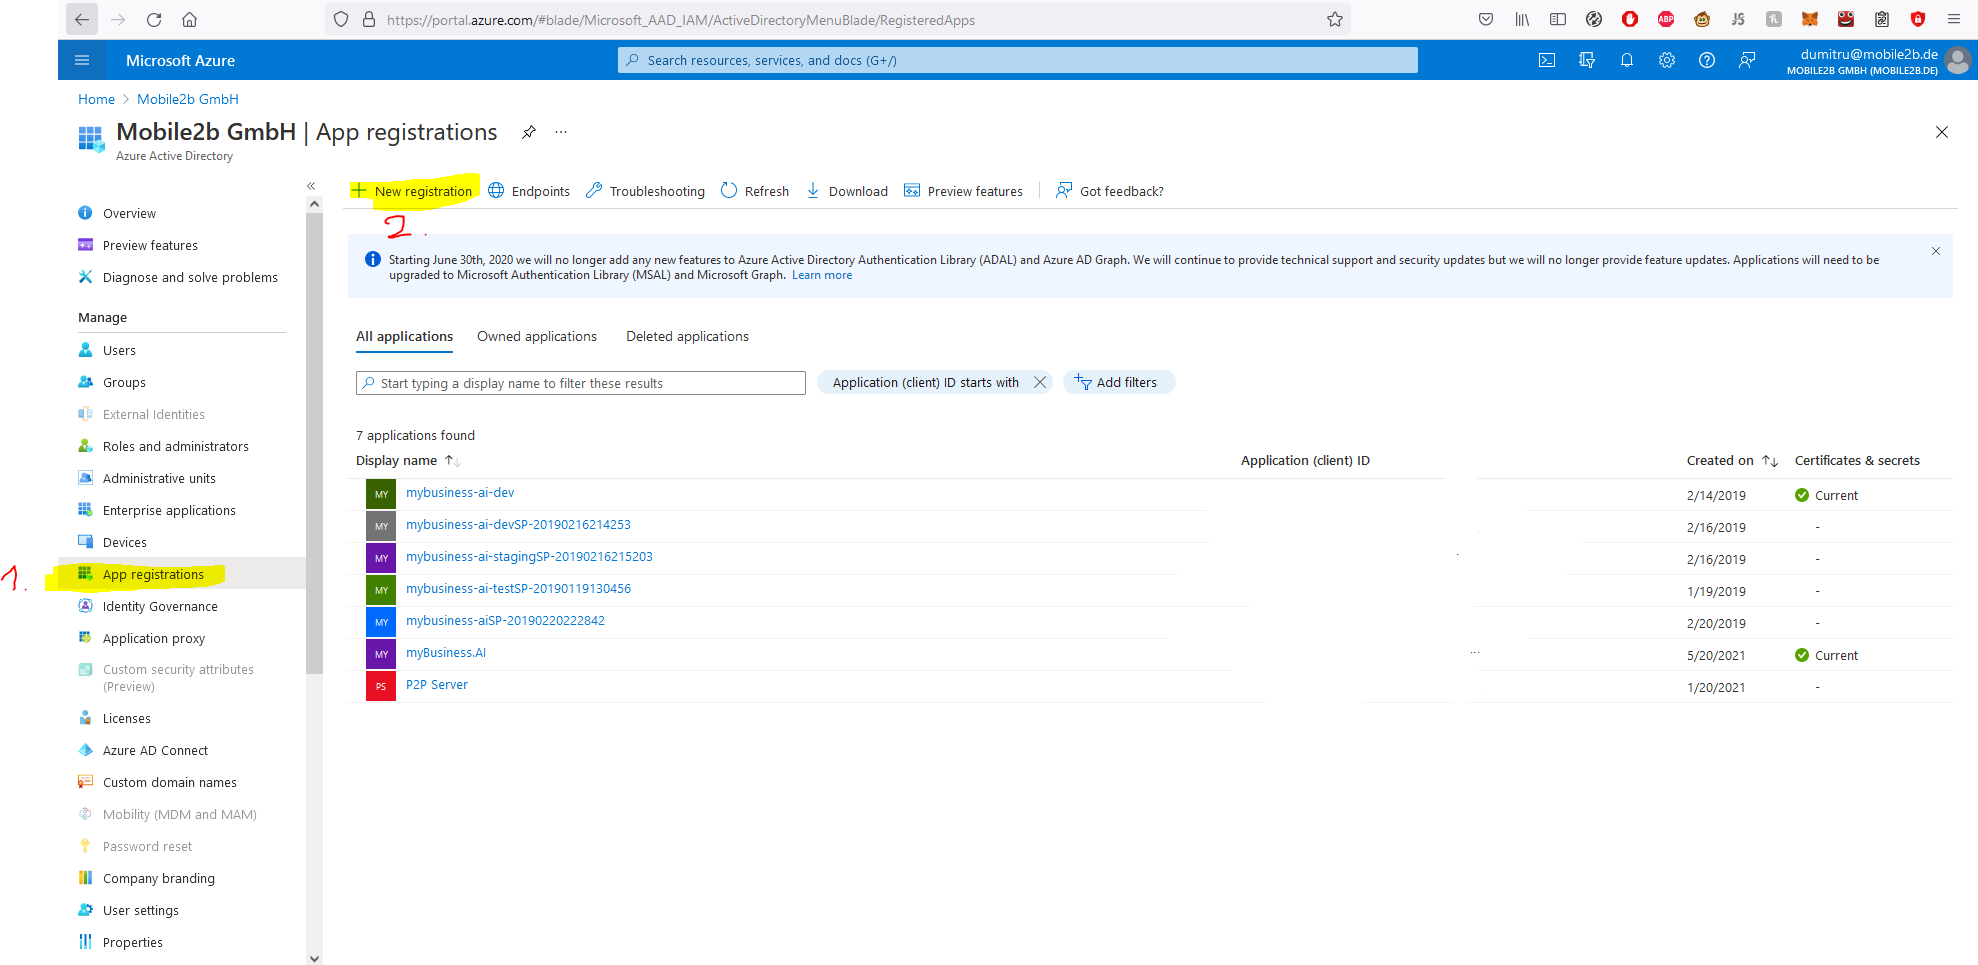
- In left hand menu, navigate to "App registrations" and click on "New registration"
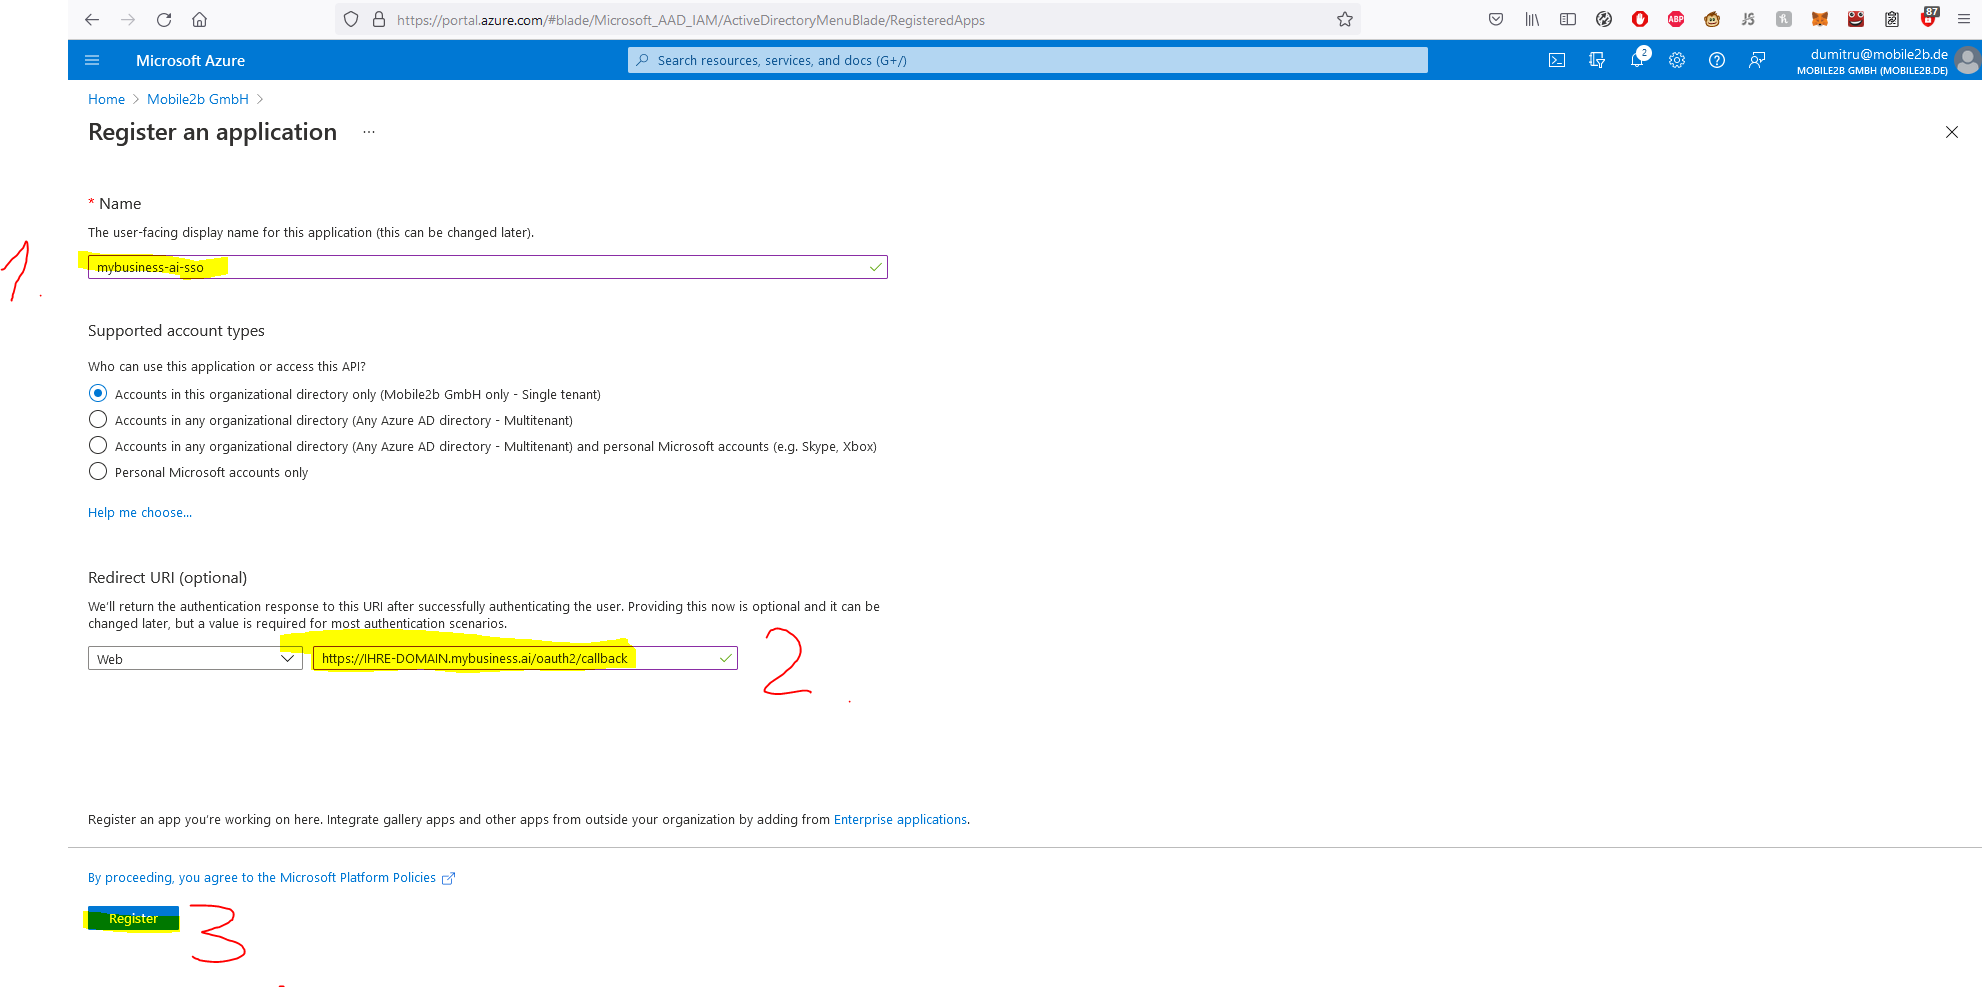
- Insert a name for the application (e.g. "mybusiness-ai-sso")
- In the field "Redirect URI" insert
https://YOUR-DOMAIN.mybusiness.ai/oauth2/callback. You will have to replace YOUR-DOMAIN in this example with the subdomain of your Mobile2b workspace. You can copy this value directly from the Mobile2b Integration Hub. - Click "Register"
-
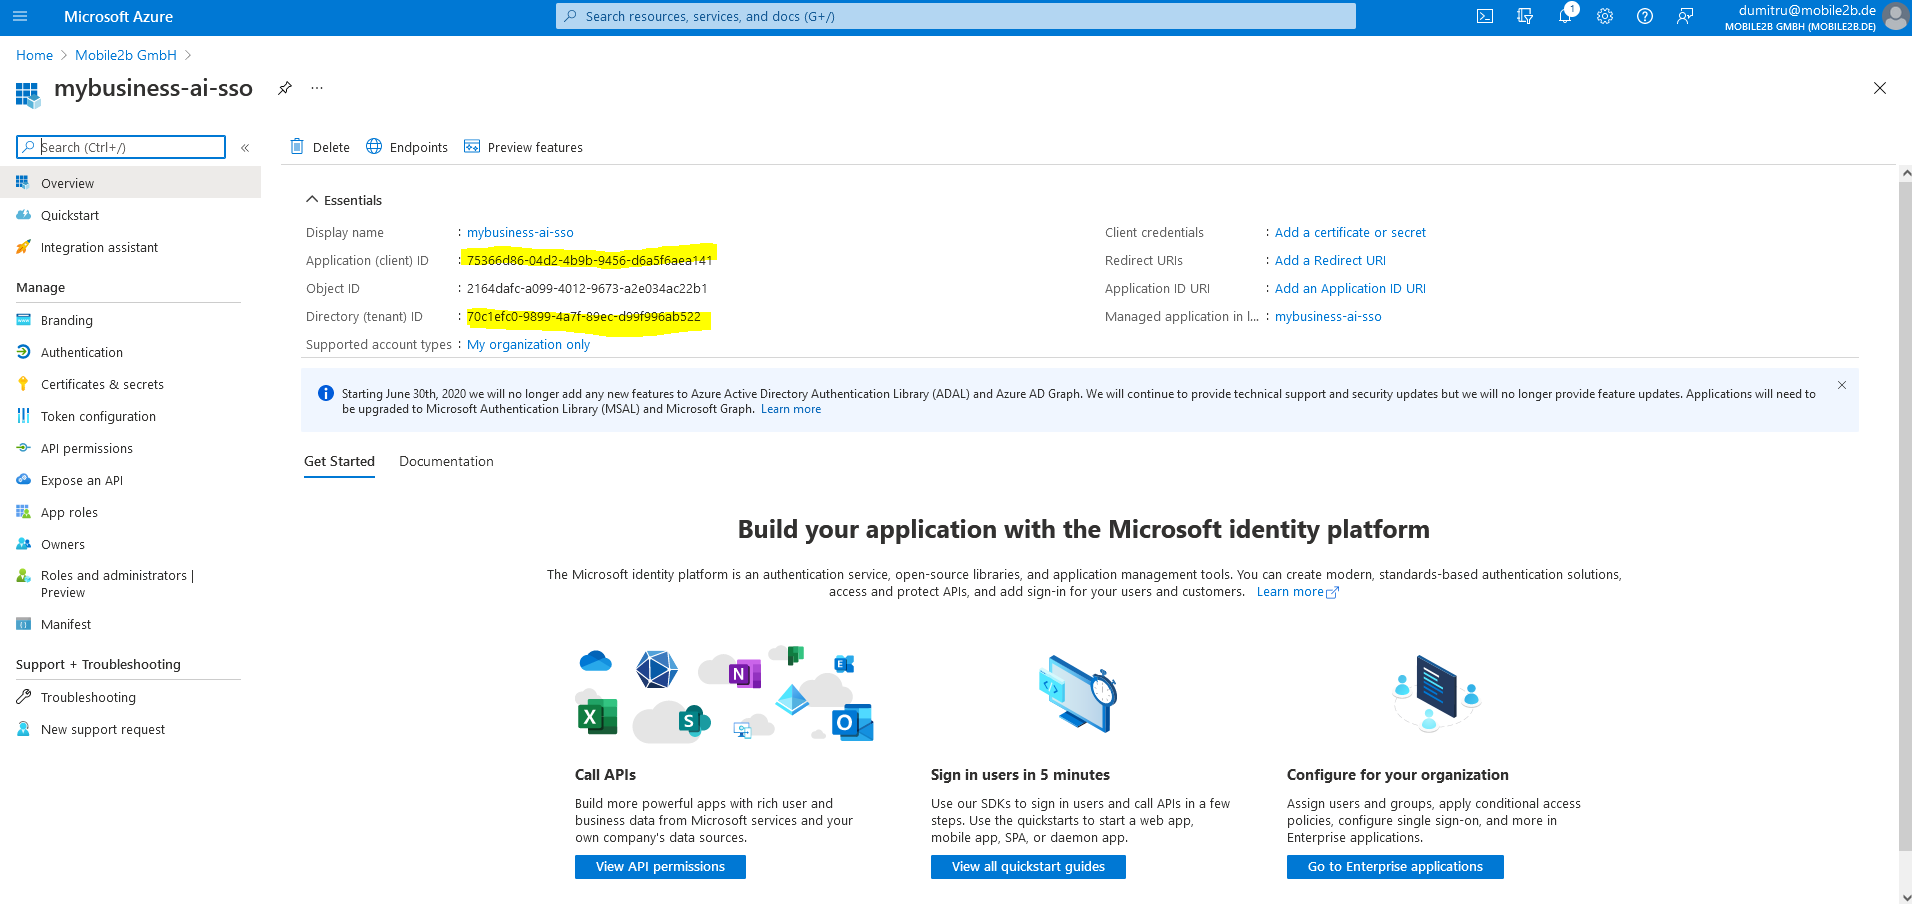
Navigate to the "Overview" of the new app registration and copy the following information:
-
Application (client) ID
-
Directory (tenant) ID
-
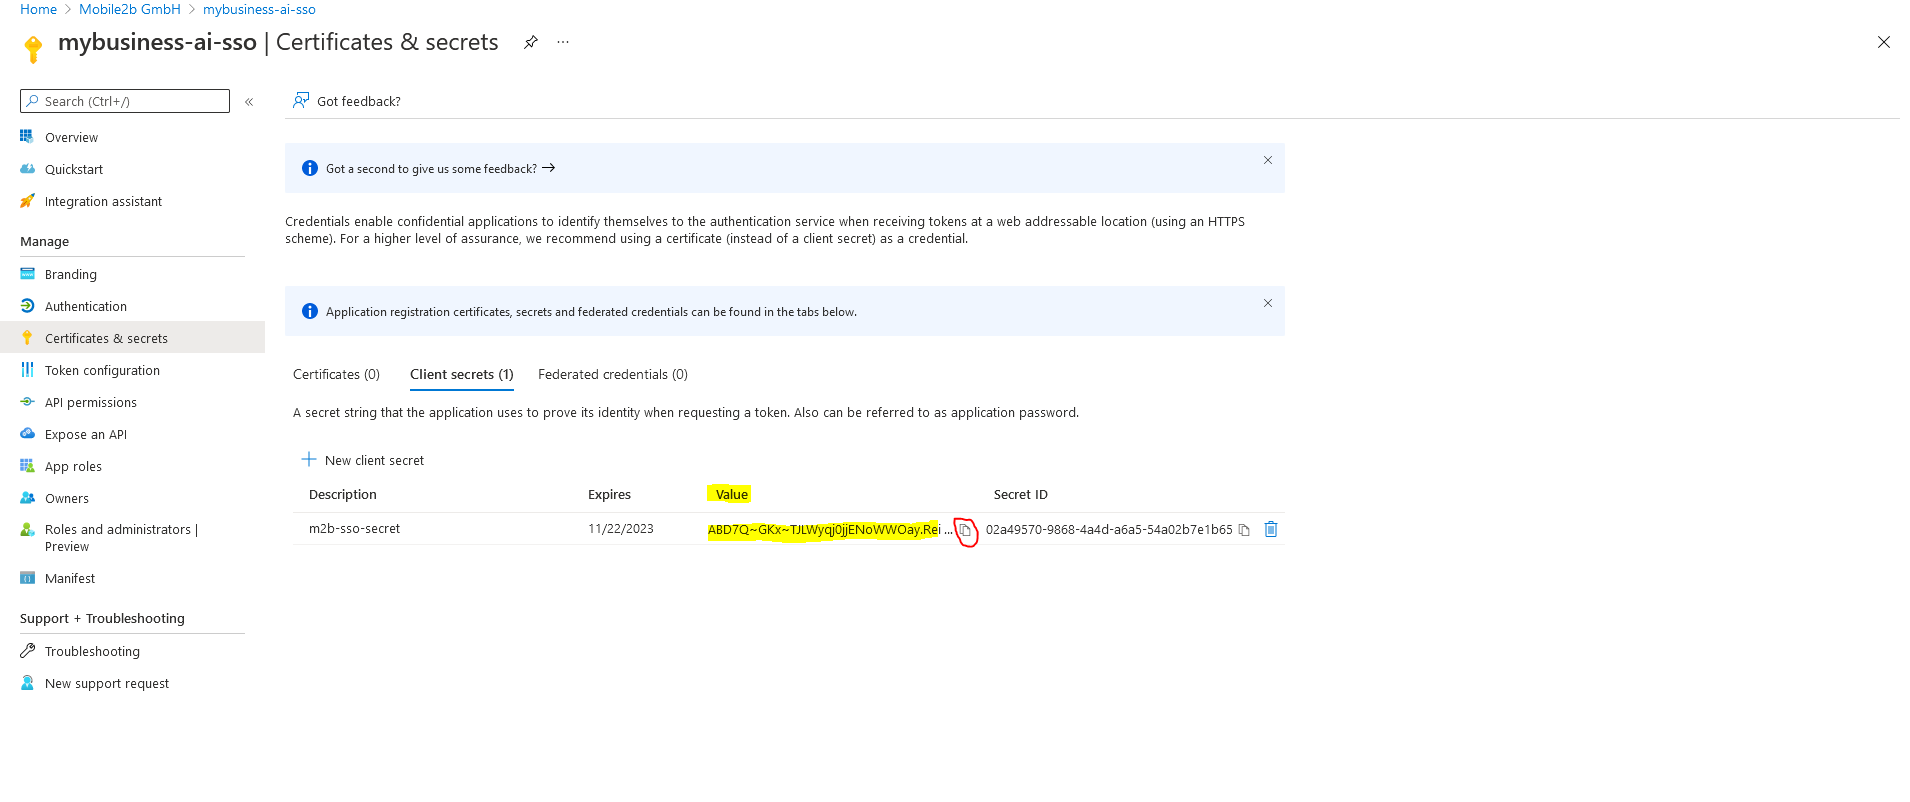
In left hand menu, navigate to "Certificates & secrets" and click on "New client secret"
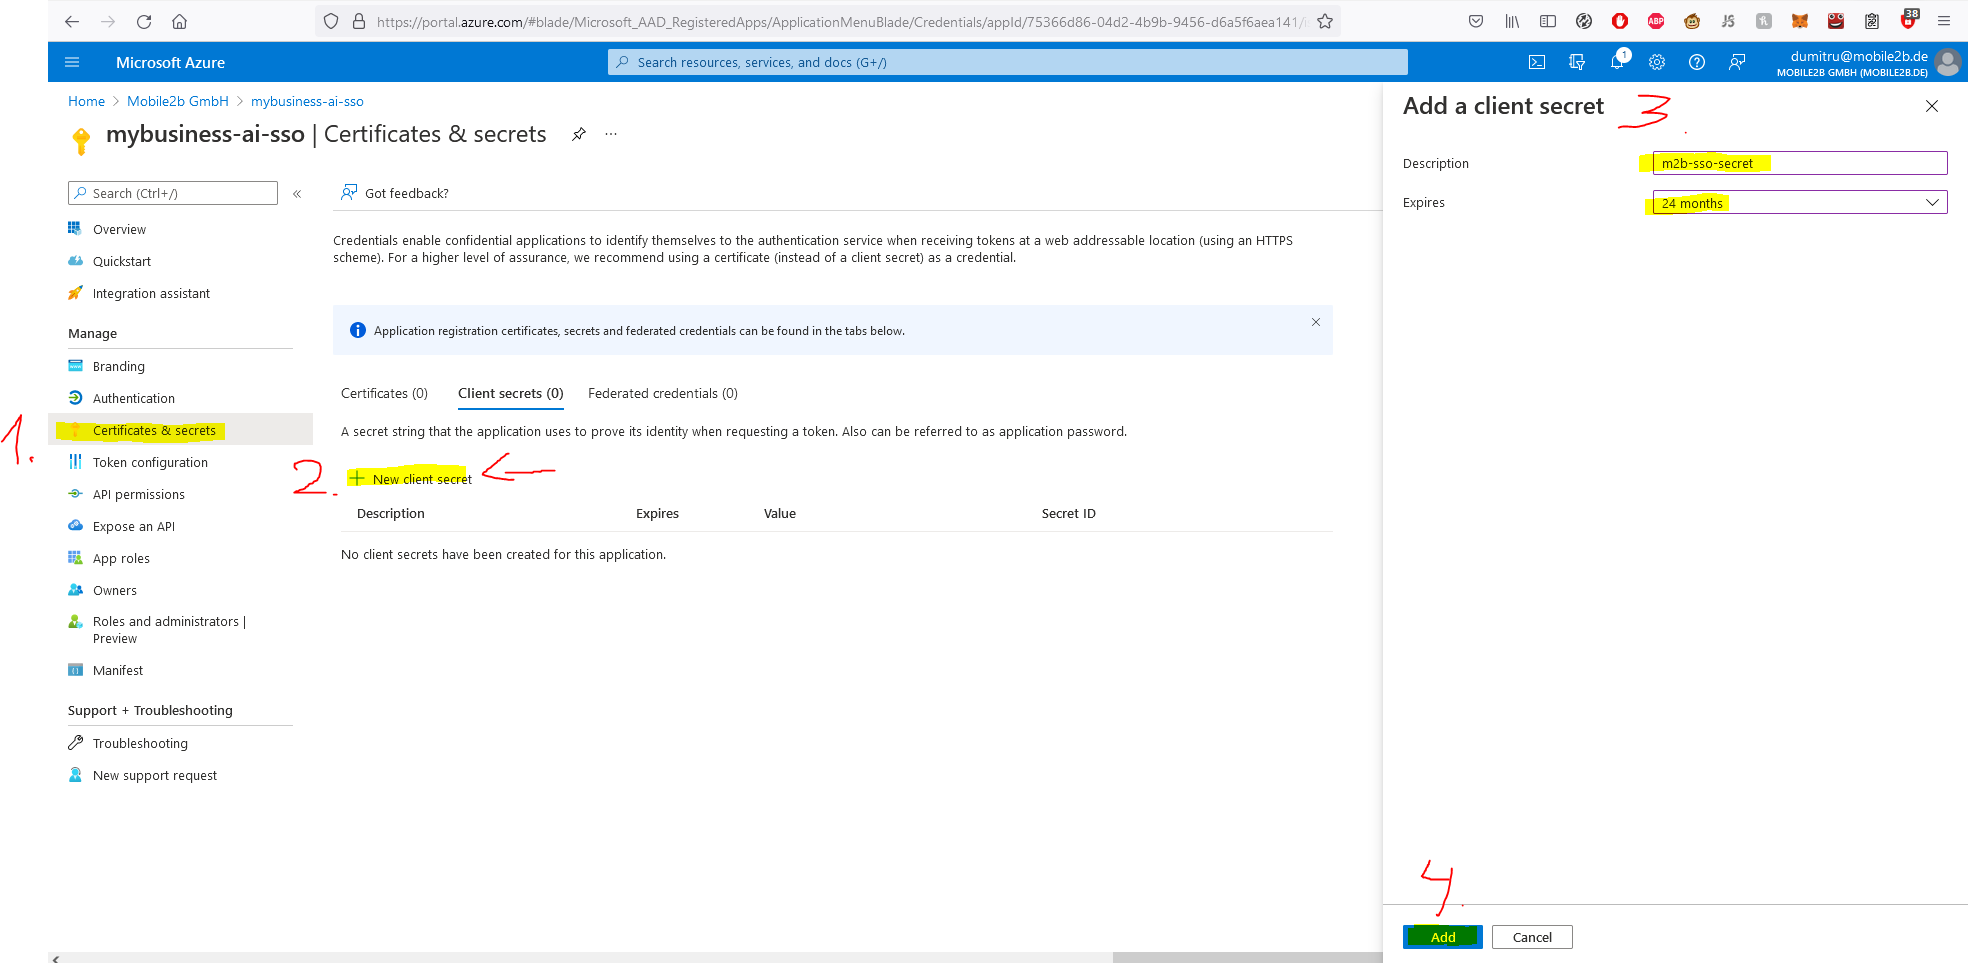
-
Copy the Value of the created secret (not the Secret ID)
 You should now have three values:
 -
Application (client) ID
- Directory (tenant) ID
-
Client secret value
-
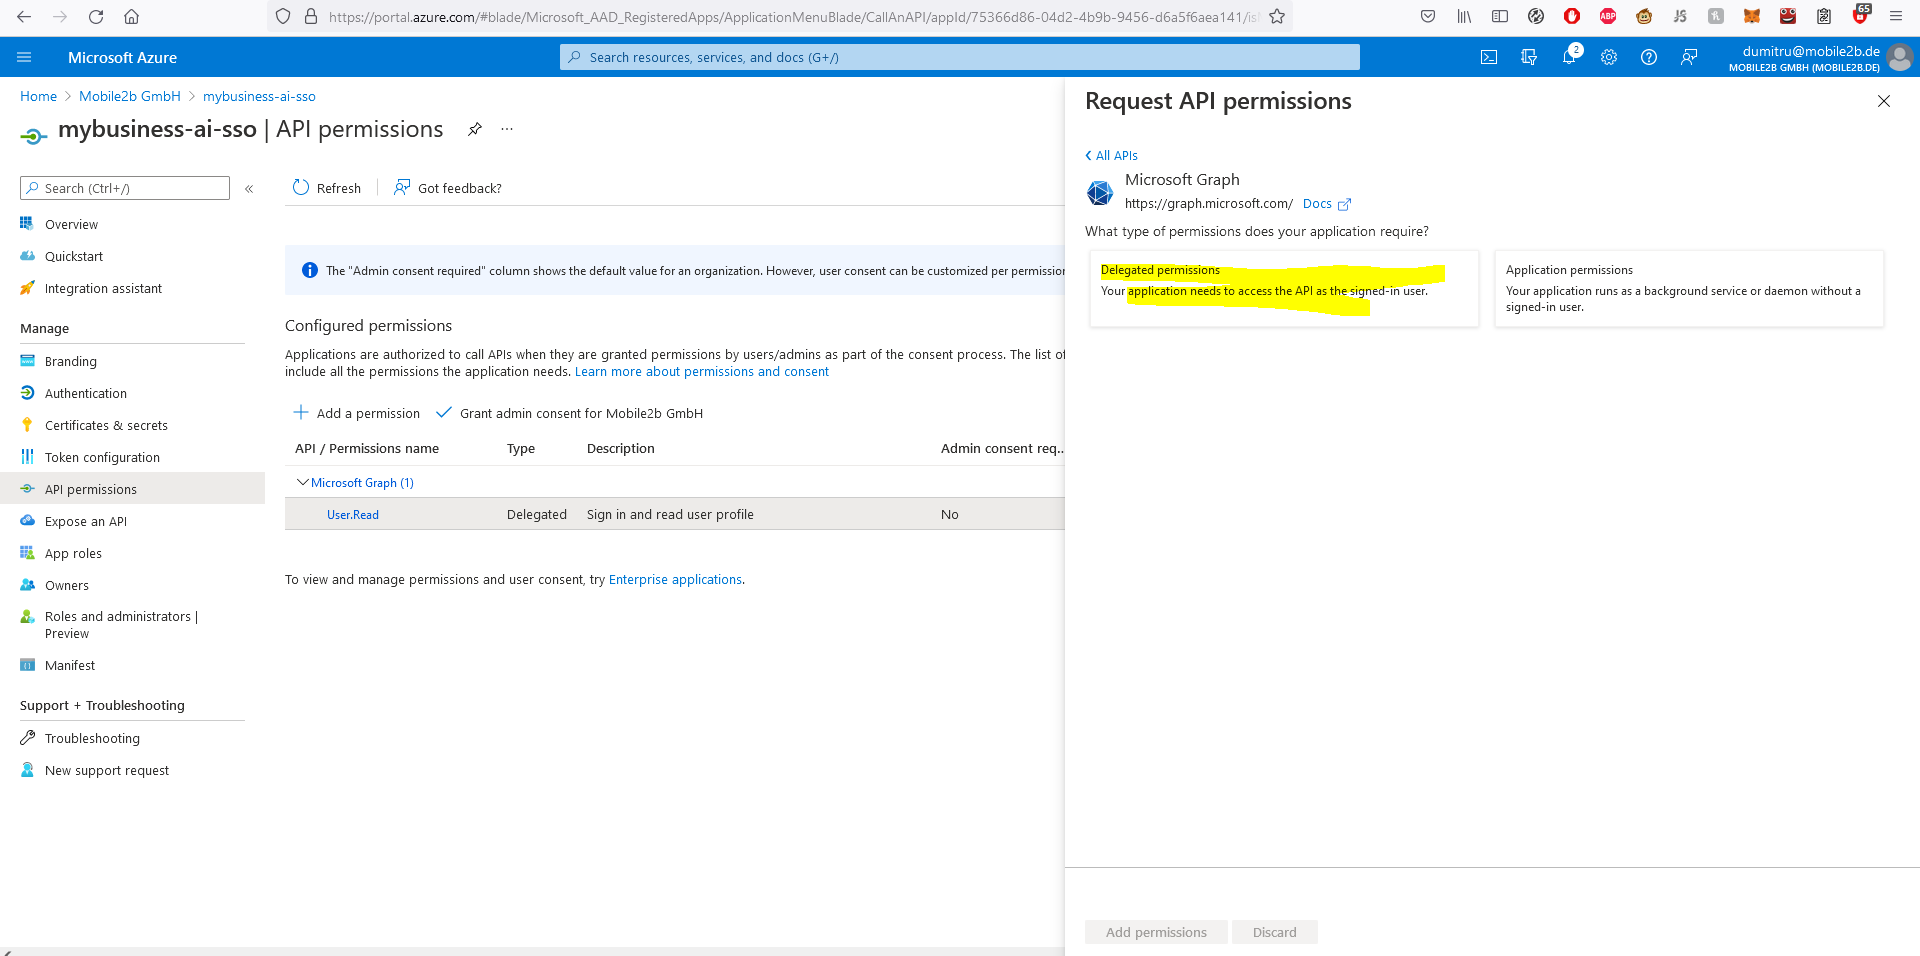
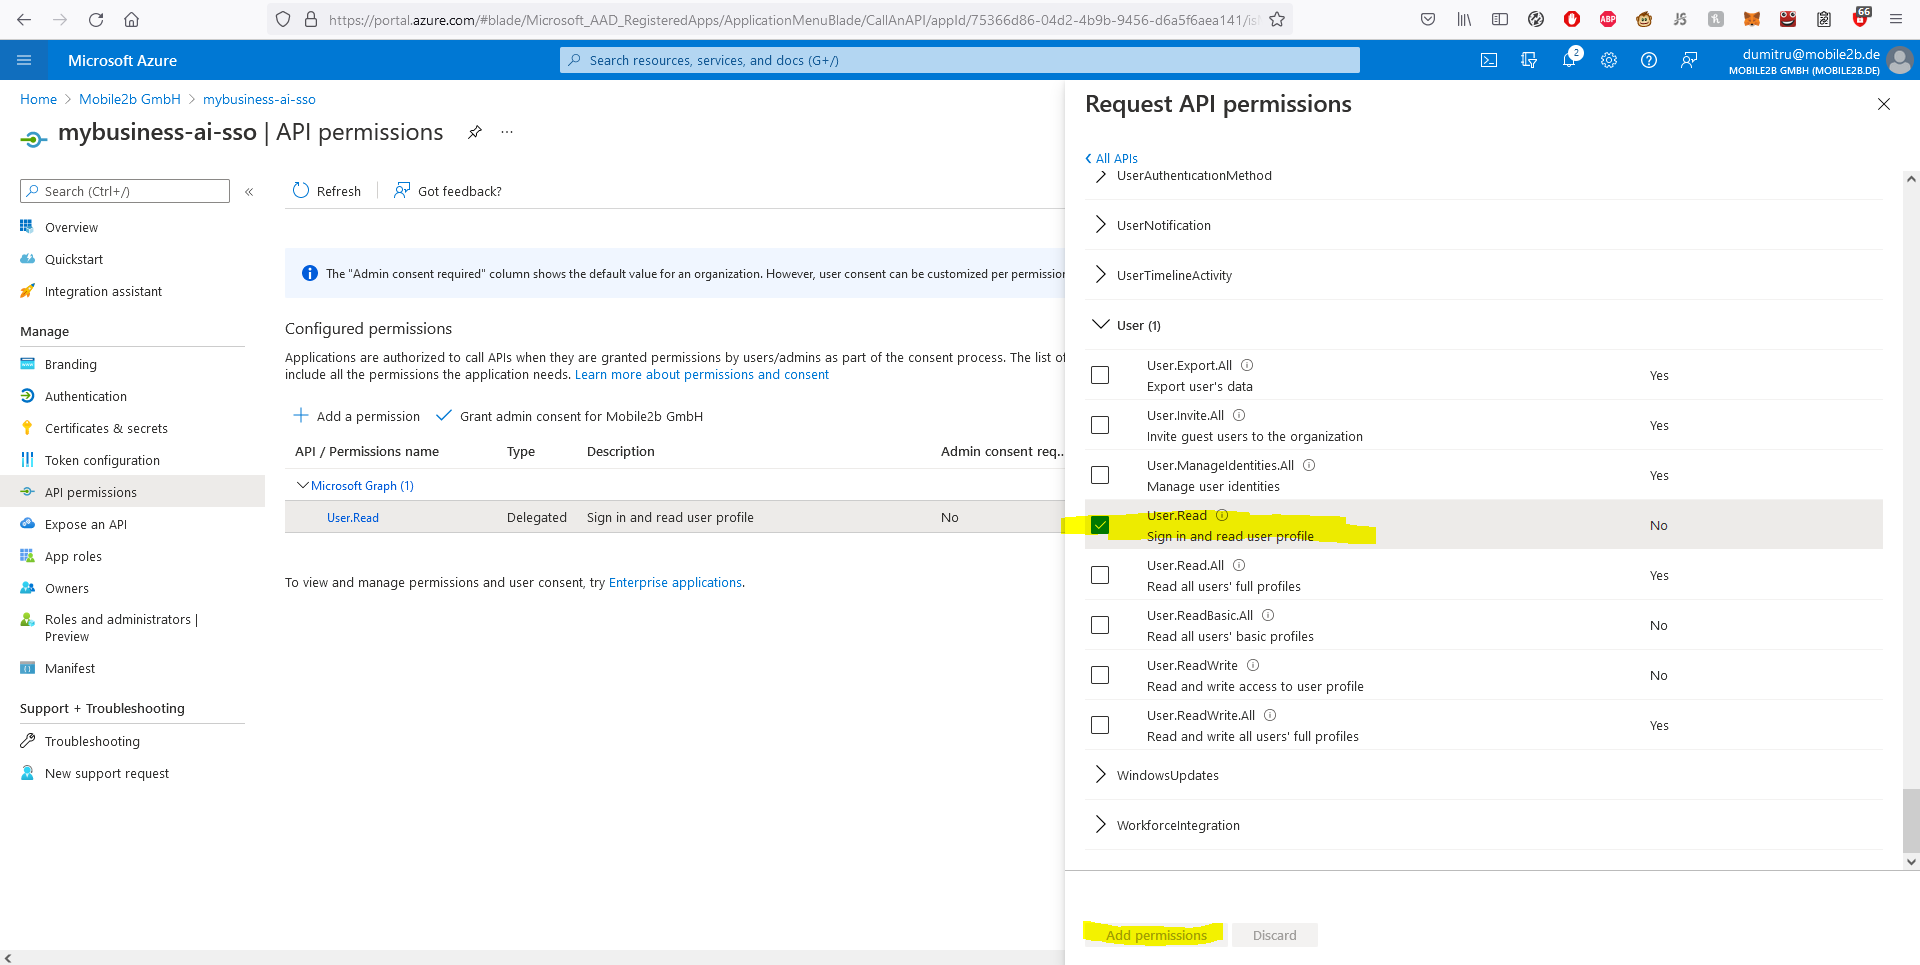
In left hand menu, navigate to "API permissions". Mobile2b needs the
User.Readpermission to sign in a user.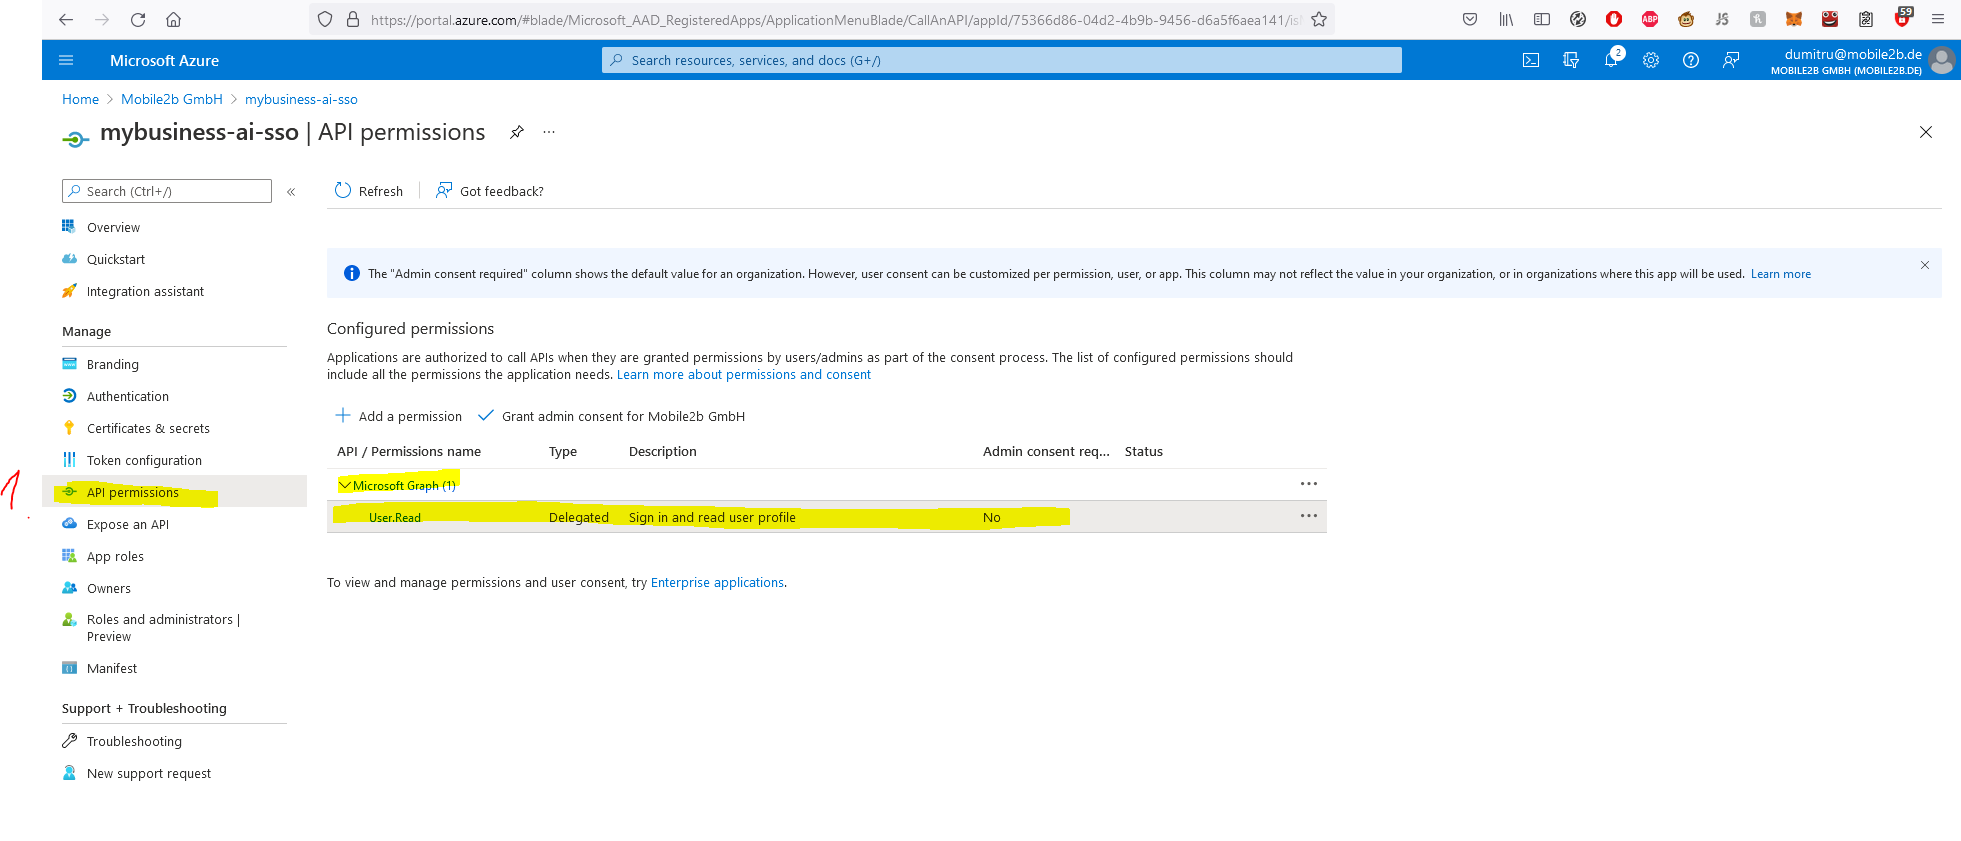 If the
 User.Readpermission is not granted, you need to add it by selecting "Microsoft Graph" and then "Delegated permissions". Here you check theUser.Readpermission and click on "Add permissions".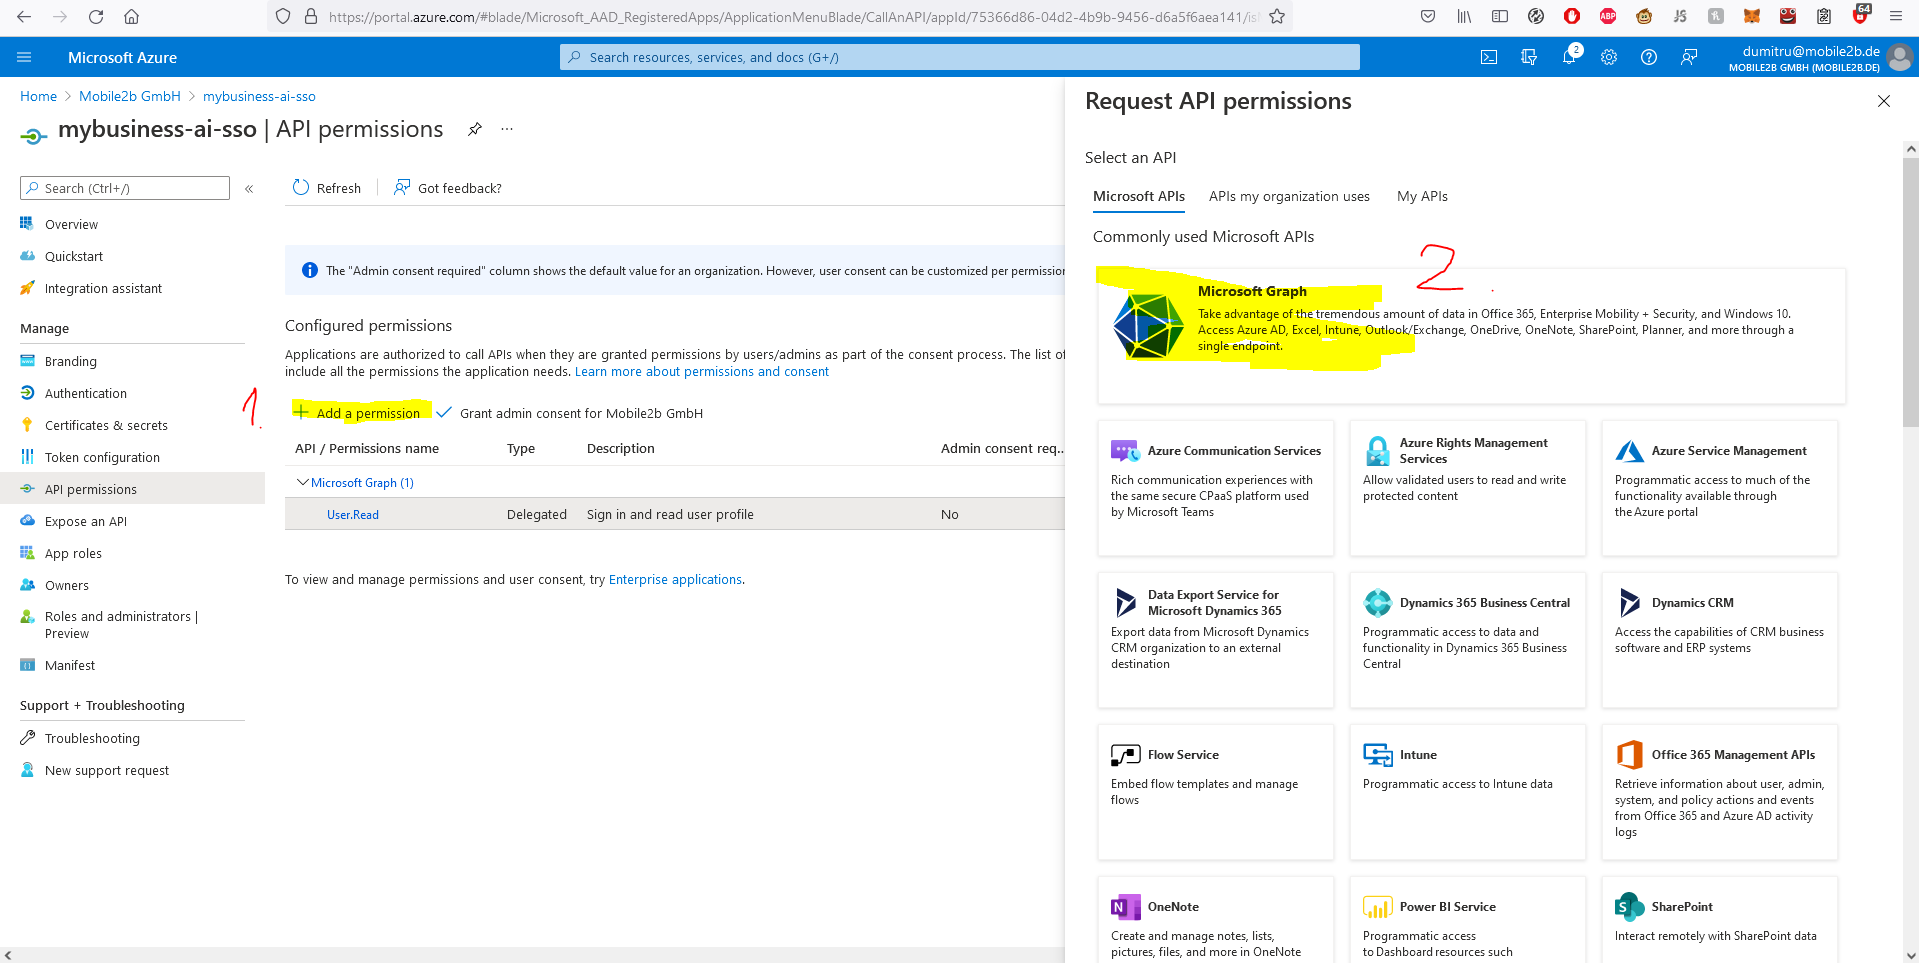
-
The configuration of the Azure Portal is now finished. Next, please log in to you Mobile2b workspace and navigate to the Integration Hub. In the Integration Hub, add a new "Azure AD Single Sign-On" integration. Enter the three value that you have collected before and enter into the form:
-
Application (client) ID
- Directory (tenant) ID
-
Client secret value
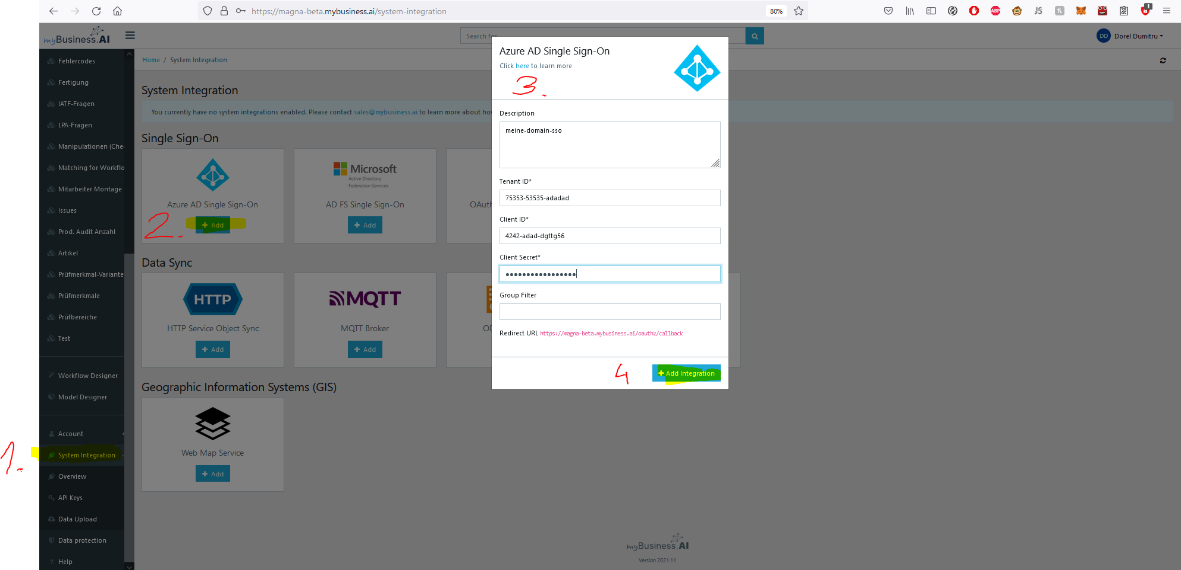
-
After you have saved the integration via the button "Add Integration", the Azure AD SSO integration is ready to use. To test, please log out and return to the login screen. If everything was set up correctly you should see a new "Login with Azure Active Directory" button.
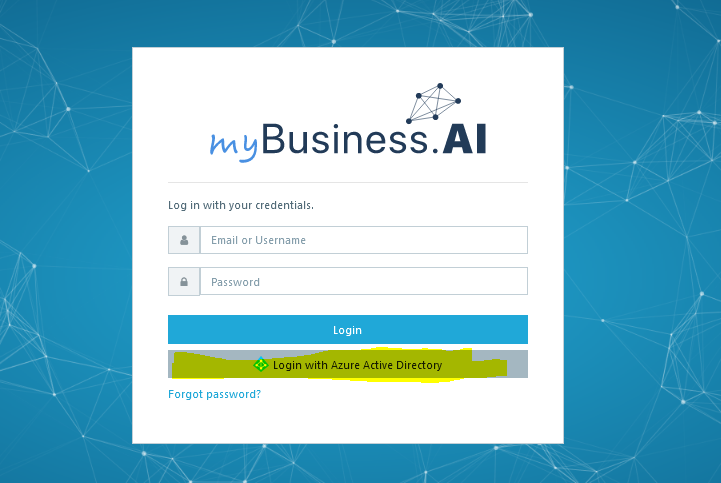
- Click on the SSO button and follow the Microsoft login flow. After you have successfully authenticated with Azure AD, you will be redirected to Mobile2b and automatically be logged in to your workspace.
See Integration Hub